online retailer, bulk & wholesale and OEM/ODM e-shop of Clothes hanger and rack")


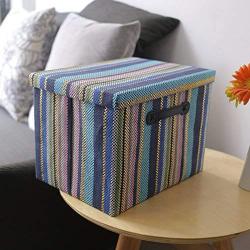
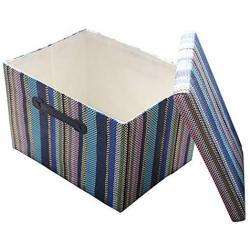
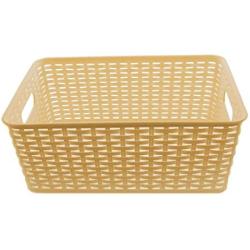
Teng Tian Basket Storage Basket Square Boxes Desktop Organizer America White Wood Imported Indonesian Rattan Casual Style,
About this product
*They are great for many other uses as well.
*Materials: the basket body adopts from Southeast Asia tropical rainforest in Indonesia rattan city; bottom board and a frame basket, are used America hardwood king
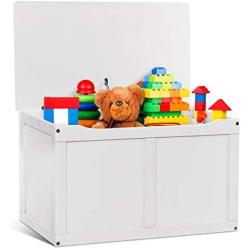
*Appearance: parallel rectangular right without cover, smooth appearance.
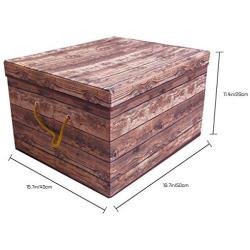
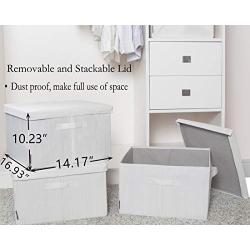
*Types and dimensions:11.4*6.1*H4.3in
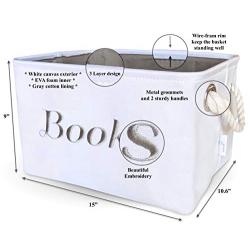
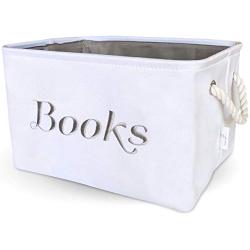
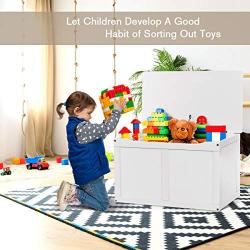
*Durable & Stylish Organization
Description
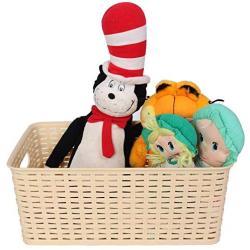
Create your own still life with this picture perfect fruit bowl. Keep your bowl on the table filled with fresh fruit to start your day.
These are the baskets with the most uses. Although they were each made for a specific use they are the perfect cracker, biscuit and bread baskets with which to decorate your table. They now come with a bonus;
Wooden bases usually are
shaped differently on each side
The side with the round edge will
become the inside of the basket
The side with the straight edge
will be the outside, or bottom, of
the basket.
Sand both sides of the base, and pay special atten-
tion to the inside(rounded) side When the basket
is finished it will be difficult to easily sand this side
again
I am always pushing the newly woven rows down
with my fingernails. However, after one or two bas-
kets, these-my best tools-have worn down and i turn
for help to a screwdriver to gently push the weavers
close together.
Keeping the weaver slightly damp also will fa-
cilitate your control of it
1. Finish weaving row 2 and proceed to row 3. In
these first few rows it is important to keep the rows
of weaving as close together as possible. The first
ow should touch the wooden base. the second row
should touch the first row the third row touch the
second, and so forth
release the tension of the weaver and weave three
or four staves at a time
If you have accurately tapered the staves, the
rounding of the curve will correspond to the end
of the taper.
Continue to push one row down close to the
row below it. A Nantucket Lightship Basket is
judged by its close, tight weave. Each row should
touch the row above and below it with no "holes
visible.(Once you have released the horizontal
tension of the weaver, it will be easier to push
the rows together. Weave to the top of the mold
Next, turn the rims over and plane where marked
on the flat sides of each rim, again planing from the
mark to the end. Leave more reed near the mark
and take off more reed near the end of the rim. You
have now“ scarfed” the rims
To enhance their appearance, whittle and sand
the edges of the joint where one piece of reed meets the other
Again make a pencil mark at a point where the edges
of the rim are touching each other. Remove the rim from the basket
The outer rim should fit snugly on the basket when completed. To achieve this i glue this rim ever so slightly tighter than my pencil marks
While holding the basket in front of you, turn it
slowly and take a critical look at the rim to see if it
appears to be level all the way around If it does not
move the rims up or down where necessary.
At each pencil dot, drill through the rims and
stave. You will need a hobby drill that can take bits
small enough to match the size of the escutcheon
pins you use.
Use the carriage fine cane to lash the rim. In
addition, you will need a piece of“ common”cane
as a filler piece. This filler piece lies on top of the
rim of the basket and hides the stave ends that you
see between the rims
base again running right to left. The handle also
will run right to left, along with the grain. Choose
two locations on the rim, points directly over a stave
Finish the basket with a preservative. You can
wood-burning tool, or even a ball-point pen
use shellac or polyurethane.
Frequency Asked Questions
What is speedhanger.com?
Speed Hanger is a qualified supplier of individual hanger, including hanger, velvet hanger, wood hanger,metal hanger,plastic hanger, pearl hanger, bead hanger, wedding hanger,bride hanger,pants hanger, closet and clothes hanger, coat hanger, standard hanger, coat hooks, garment rack, coat rack and other new products.
How about the Safe package and defective and broken questions?
- For small order or samples, we all use bubble bags or foam to pack one by one.
- For large quantity of container order, standard export pallet package or paper carton with safe card board packing. Also customized gift box is accepted.
- Other accessories like hooks will put in another carton to avoid hitting. the broken rate is under 0.2%. Spart part is included.
- compensate the defective and broken unit by your next order freely.
What service could be support?
- Sure, customer logo as you need and support decoration firing ,screen printing, hot stamping, frost, label printing etc.
- About printing color: it can be made according to PANTONE color number. e broken rate under 0.2%.
How to guanrantee quality?
For all orders, three steps to control quality, QC inspection for all incoming meterial, in-line qc inspection and final output inspection.
How to inquiry product bulk price?
For the interested product, you can submit bulk price inquiry by bulk order inquiry form.
Related Products